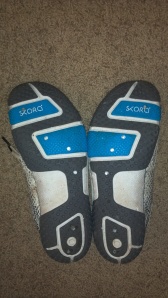
I hadn’t run a trail race in icy/snowy conditions before this Saturday’s “Alternate Chili 10 Mile Run” (actually, 10.35 miles!). With a wintry mix in the forecast, I made some preparations to screw my shoes, as recommended by the Trail Nerds, the race sponsor. Hexagonal, slotted sheet metal screws are a great way to add traction if you are going to encounter snow and ice on a trail. I haven’t tried this on paved roads/trails. I’ve always found I get sufficient traction from my Skoras on the road. You’re not making track spikes here – you can’t or wouldn’t want to put the screws in from the top of the shoe. The many faces of the head of the screw are what provides the added bite.
Since the screw lengths recommended by the Trail Nerds aren’t compatible with minimalist shoes, some modification was necessary. So, with apologies and this rather vague attribution to their fine tutorial, here’s the Skora version. Please note: I did this with my Forms. It should also work with the Base, since they share the same R01 outsole. I’m not sure this would work with the R02 outsole on the Phase and Core.
Step 1: Take off your shoes (obscure Swants reference – worth a Google if you don’t get it).
Actually, this isn’t strictly necessary. If you’re rushing to do this right before a race or run, or doing it for a friend who’s already got them on, you’re not going to poke them/yourself in the foot so long as you are using the right screw length. I do think it’s a lot easier if you’ve got the time to do this before.
Step 2: Find some screws, and something to screw them with.
Ok, here’s where it gets technical. Joking. If you own any tools at all, odds are you’re going to be able to handle this.
Selecting/finding the right screw is really the hardest part. You don’t want the end of the screw poking up through your sole into your foot. I did NOT think that 3/8″ length would work, so I used #4 – 1/4″ length screws. The #4 refers to the head size. The 1/4″ is the length of the shaft of the screw.
Only $4.99 for 100! You’re not going to find these at your big-box hardware store. I tried, I failed. 3/8″ is as short as they go. Try a specialty mom & pop store. Something with hardware in the title.
Small but mighty.
These two tools aren’t necessary, but they will make it go faster if you have them. The bottom pic is a socket for the hex head of the screw. The size is 3/8″ (matches #4, don’t ask). If you can find a magnetic one, so much the better. Once you pick up the screw you’ve dropped for the tenth time, you’ll thank me. But like I said, if you don’t have the power tools, the hex head screws are slotted, so a regular screwdriver will work too.
Step 3: Pick a pattern and start screwing the screws in.
I’m a first-timer, so you aren’t getting the benefit of a lot of experience here. My advice would be: don’t go overboard; put them in contact/takeoff areas (look for wear); put a few at the back (I’m not a heel striker, but if you start sliding, you’re going to use parts of the shoe you wouldn’t ordinarily use); do it symmetrically; and start the screw at a high point on the sole (i.e., don’t start the screw into one of the holes or slots in the pattern – you want as much rubber as possible gripping the screw). I just ran them in to flush. Don’t overscrew them or they might poke through. Here’s the pattern I came up with:
Pretty symmetrical. I think the only one you can’t see is one I put up in the big toe area on each shoe.
So, how did they work? Great! 10.35 miles over some extremely hilly, rocky, slippery terrain. ZERO FALLS! I fall all the time on this trail in good weather. The day before the race we had some freezing rain followed by rain into the evening, which switched over to a light dusting of snow (less than an inch) but just enough to cover everything and hide the bad spots.
You’re going to lose a few screws. It’s a tradeoff – you don’t want the screw poking through into your foot. I think (but haven’t actually verified) that 1/4″ is as long as you can go without doing that. My lost screw count was 3/10 on each shoe. The lost screws were symmetrical too:
Happy winter running!
My stats: 20th overall out of 150; 3rd male 40-49; 1:37:07; 9:43 pace.
A few more miscellaneous tips (not related to screwing your shoes):
I smashed the palm of my right hand pretty good while pacing the OT100 in November. Fearing a reinjury (I still have a twinge now and then) I decided a little protection was in order. Luckily, being a Gen-Xer, I had some dusty rollerblade wrist guards in my closet. I busted them out and wore just the right wrist guard.
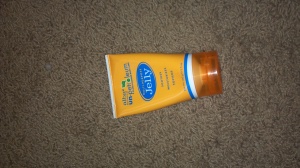
Since this was a last minute thing, I forgot that gloves wouldn’t fit over this. With a 15mph wind and sub-freezing temps, I wished I had some mittens, but left them at home. If only I had a sequined glove for my left hand… I did have my Alba un-petroleum jelly with me though for my nose and cheeks, so I slathered some all over the exposed skin on my right hand. It was as good as a glove!
| 20 | THEODORE KARDIS | 328 | OLATHE | KS | M | 43 | M 40-49 | 3 | 18 | 1:37:07 | 9:43 |


